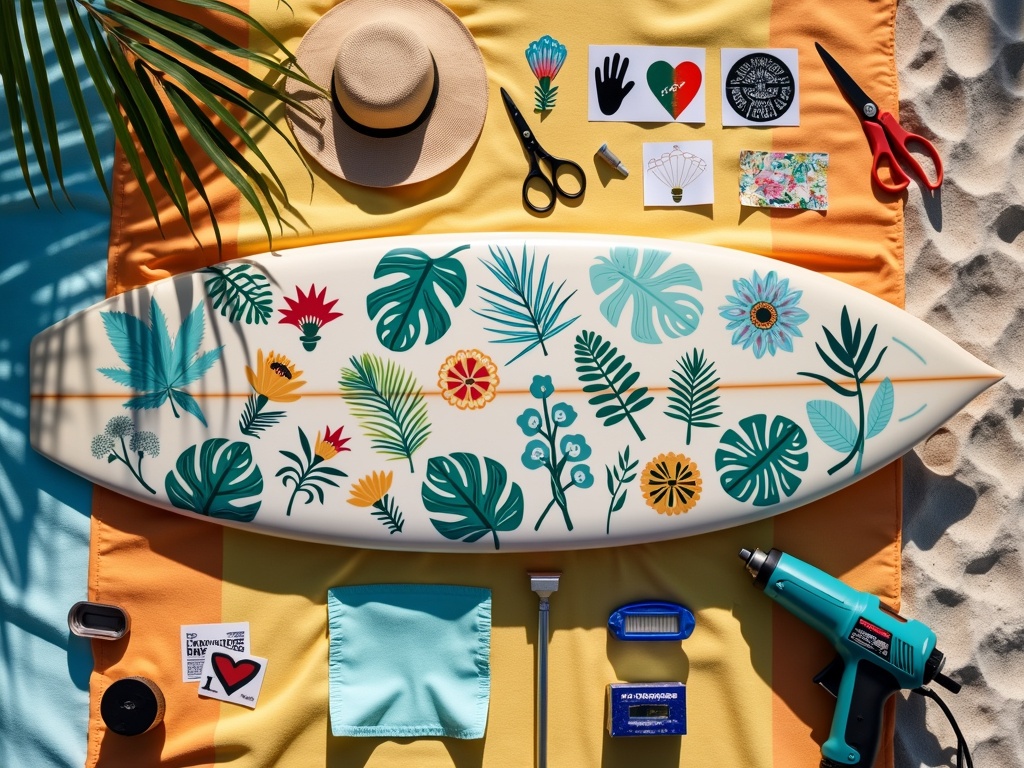
Surfboard stickers, also known as surfing stickers, are decals specifically designed to adhere to the surface of a surfboard. They are one of the easiest ways to transform your board into a piece of surfboard art. Whether you’re looking for something bold and colorful, a minimalist logo, or some nostalgic vintage style, the right choice can bring out your style and make your board stand out in the lineup. But not all surfboard stickers are created equal, and choosing the right ones and applying them properly can make a big difference in both appearance and durability.
In this guide, we’ll break down everything you need to know to choose high-quality stickers and apply them like a pro.
Choosing the Best Surfboard Stickers
When choosing surfboard stickers, keep in mind they’ll be exposed to harsh conditions: water, sunlight, and sand. That means you can’t just pick any sticker off the shelf. Let’s dive into what makes a surfboard sticker durable, stylish, and long-lasting.
Materials
The material is the foundation of any great surf sticker. Surfboards face intense exposure to natural elements, so your stickers need to be tough enough to handle it.
· Waterproof Vinyl: Vinyl stickers are the gold standard for surfboards. Waterproof vinyl is highly durable, flexible, and resistant to cracking or peeling. Pairing vinyl with a proper laminate coating also ensures your design stays vibrant and intact, even after long days in the water.
· Lamination Options: Lamination is an extra layer of protection that keeps your surfboard stickers safe from scratches, fading, and water damage.
o Liquid Lamination: A thin liquid coating is applied to the sticker, creating a shield against the elements.
o Film Lamination: A physical layer of film is added to the surface, offering even greater protection. This option is ideal for surfers who want their stickers to last longer in demanding conditions.
These materials ensure your stickers not only look great but also stay firmly in place after hours of surfing.
Finish
The finish of your sticker has a huge impact on its overall look and feel. Are you aiming for something bold and eye-catching, or subtle and refined?
· Matte Finish: Matte stickers have a smooth, non-reflective surface. This finish is perfect if your design includes text or fine details since it reduces glare and makes everything easier to read. Matte finishes are great for those who want a more understated, modern look.
· Glossy Finish: Glossy stickers are shiny and reflective, which makes colors appear more vibrant. This finish is perfect for designs that need to pop or grab attention. Glossy stickers also tend to look brighter and more dynamic under sunlight, making them a popular choice for bold graphics.
Choosing between matte and glossy finishes comes down to personal style and the design of your surfing stickers. Both are great options, but the right one will depend on the look you’re going for.
Choose the Right Size
Size matters when it comes to surfboard stickers. Think about how much space you have on your board and what kind of impact you want your stickers to make.
· Full Deck or Rail Coverage (20×6 inches or longer): If you’re someone who loves a big, bold design that spans across your board, opt for oversized stickers. These can run from the nose to the tail on the deck or along the rails, creating a striking look that completely transforms your board.
· Large Stickers (6×6 inches or bigger): Great for making a bold statement without fully covering your board. These stickers work well on the nose, deck, or bottom for maximum visibility.
· Medium Stickers (3×3 to 5×5 inches): These are versatile sizes that strike a balance between bold and subtle. Medium stickers are perfect for placing on the deck, rails, or bottom without overwhelming the board’s design.
· Small Stickers (2×2 inches or smaller): Perfect for minimalist designs or adding small details. These sizes work well for rails, tail, or even fins.
Think About Durability
Durability is key when choosing surfboard stickers. Surfboards face constant exposure to water, UV rays, and salt, so your stickers need to be tough enough to handle it all. High-quality stickers are made with waterproof, moisture-resistant, and UV-resistant materials. They’re designed to stay in place even after hours of riding waves. By investing in durable stickers, you’ll ensure they last as long as your board does.
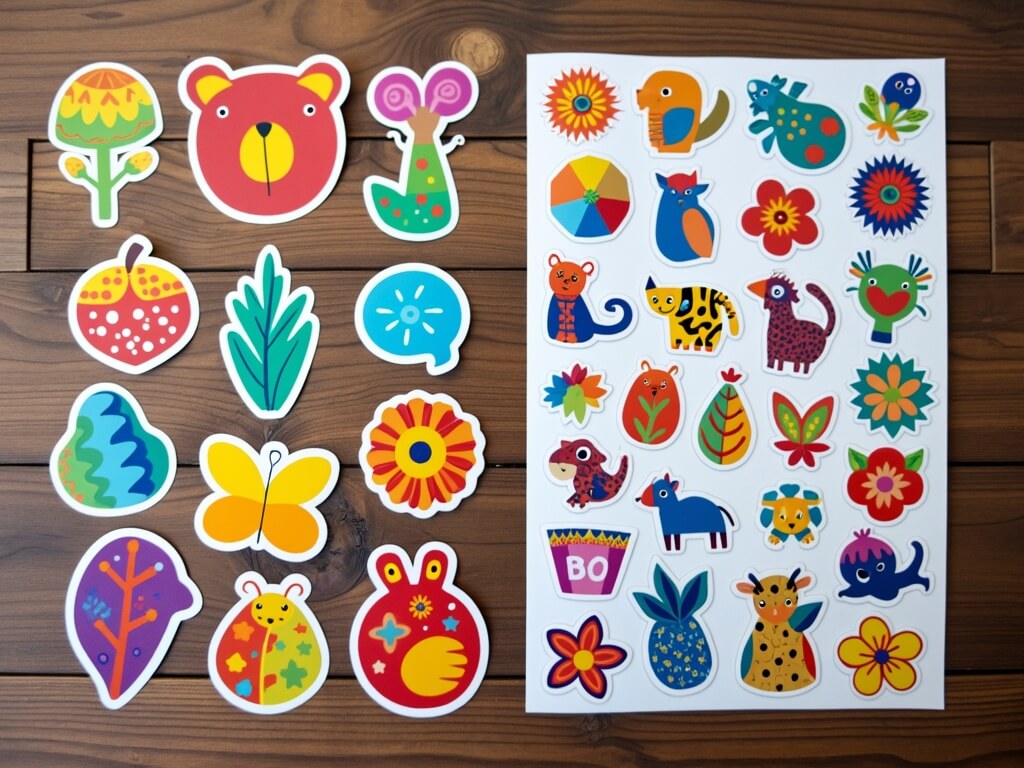
Mix and Match
Don't be afraid to mix and match different stickers to create a unique look. Combining stickers of various sizes and designs can result in a dynamic and eye-catching composition. Experiment with different arrangements before committing to a final design. Mixing and matching allows you to express multiple facets of your personality or interests. You might combine a love for nature with a passion for art, or mix brand logos with personal symbols. The freedom to play with combinations ensures your board is a true reflection of your individuality.
How to Apply a Sticker to Your Surfboard
Once you’ve picked out your perfect stickers, with plenty of sticker ideas to inspire your unique design, it’s time to apply them. This process is simple but requires some care to ensure a smooth, bubble-free finish. Follow these steps to get it right:
1. Pick the Right Weather
Before you apply your sticker, make sure the weather is on your side. Avoid extreme heat, cold, or humidity, as these conditions can impact the adhesive. A cool, dry environment is the best setting for applying stickers.
2. Gather Your Tools
You’ll need a few basic tools to make the application process easier:
· A hard card (like a credit card) or a scraper to smooth out bubbles.
· Soapy water to remove dirt, wax, and residue.
· A soft cloth for cleaning and drying.
3. Choose the Placement
Take some time to decide where you want your surfboard sticker to go. Popular spots include:
· Tail: Great for smaller, subtle stickers.
· Deck: Ideal for larger, statement designs.
· Rails: Perfect for adding details without overwhelming the board.
· Nose or Bottom: Great for showcasing bold designs that stand out in the water.
Consider how the sticker will look when the board is in action!
4. Clean the Surfboard
A clean surface is crucial for proper adhesion. Use soapy water to wash away any wax, dirt, or sand from the area where you’ll place your sticker. Be thorough—any residue can prevent the sticker from sticking properly. Once clean, dry the area completely with a soft cloth.
5. Apply the Sticker
Start by peeling a small portion of the backing paper and aligning the sticker on the board. Gradually remove the rest of the backing paper while smoothing out any air bubbles with your fingers or a squeegee. Work slowly to ensure the sticker adheres smoothly and evenly.
This methodical approach helps prevent wrinkles and air bubbles, which can detract from the appearance of your stickers and shorten their lifespan. Taking the time to apply each sticker carefully will result in a more professional-looking finish.
6. Seal the Sticker
To make your stickers last longer, consider adding a clear sealant over them. While it’s not a must, this extra step can go a long way in protecting your stickers from the elements. Just be sure to use a sealant designed specifically for surfboards to avoid any potential damage.
Sealing your stickers adds an extra layer of defense against fading, peeling, and wear—especially if you’re out in the water often or tackling tough conditions. It’s a small effort that can make a big difference in keeping your stickers looking fresh and vibrant over time!
Maintaining Your Surfboard Stickers
Proper care can help your stickers last longer and keep your board looking awesome. With a little effort, you can maintain the vibrant, fresh look of your stickers and the overall style of your board. Here are some helpful tips to keep them in great shape:
· Avoid Harsh Chemicals: When cleaning your surfboard, steer clear of harsh chemicals that can weaken the adhesive or damage the design of your stickers. Stick to gentle cleaning solutions that protect both your board and your stickers.
· Reapply Sealant: If you’ve added a sealant for extra protection, remember to reapply it every so often. This is especially important if your board gets a lot of sun and saltwater exposure, as these can gradually wear down the sealant. A quick touch-up will keep your stickers looking sharp and well-protected.
· Handle with Care: Be gentle with your board, especially when transporting or storing it. Scratches, bumps, or abrasions can ruin the look of your stickers. Using a board bag or protective cover is a simple way to prevent accidental damage and keep your stickers in top condition.
Final Thoughts
Adding surfboard stickers is a fun and creative way to give your board a personalized touch. By choosing high-quality materials, the right finish, and durable printing techniques, you can ensure your stickers look great and hold up to the elements. Proper application is just as important, so take your time and follow the steps to get a perfect, long-lasting finish.
With the right stickers, your board will look amazing and reflect your unique personality out on the waves. Ready to transform your board? Choose the perfect surf sticker today and make your surfing sessions even more stylish and fun!